If the toilet flushes every other time, it is sure that the rim jets underneath the toilet are clogged with mineral deposits and grime. Also, as the toilet tank’s water level determines the power of every flush, the low water level in the tank lets the toilet needs to flush frequently.

Other major reasons for toilet flushing multiple times include a worn-out flapper or the installed flapper closing too soon. Along with this, blockage in the toilet sewer line creates a weak flush pressure of your toilet.
So, in the troubleshooting period, you need to clean the toilet jets, replace the worn-out flapper and unclog the toilet sewer line. Plus, you have to ensure a proper water level in the toilet tank and fix the flapper issue if it closes too soon.
Read through our below comprehensive article to get a complete guide on this fact.
Table of Contents
Toilet Flushes Every Other Time [5 Easy Solutions]
Through this article, we have explored each of the responsive factors with a good explanation and well-proven solving methods. So, let’s start:
Note: You can also read how to fix jacuzzi perfecta toilet problems.
1. Clogged Rim Jet Holes
In every flush toilet, there have a few holes located just under the lip or rim of your toilet bowl. This series of holes are mainly referred to as the rim holes from where water pours after flushing.

In short, the holes are the openings through which water from the toilet tank flows down into the bowl, and then the flush cycle will start. But at times, the jet holes can become dirty and clogged with bacteria and mineral deposits such as lime and calcium scale.
When the mineral gathers around these jet holes, it causes the flush pressure to get less and less powerful. Calcium deposits clogging the jets will interfere with the flow of water. Also, bacteria start forming inside the hollow rim of your toilet.
So, the only solution is to clean the rim jets to eliminate the flush issue from your toilet.
How To Clean The Rim Jets On A Toilet Bowl
- First up, turn off the water supply by turning the water supply shutoff valve under the toilet clockwise.
- Then, flush the toilet to remove the water from the tank.
- Now, remove the tank cover and set it aside.
- You have to make a cleaning solution to unclog the rim jet holes from the build-up mineral deposits.
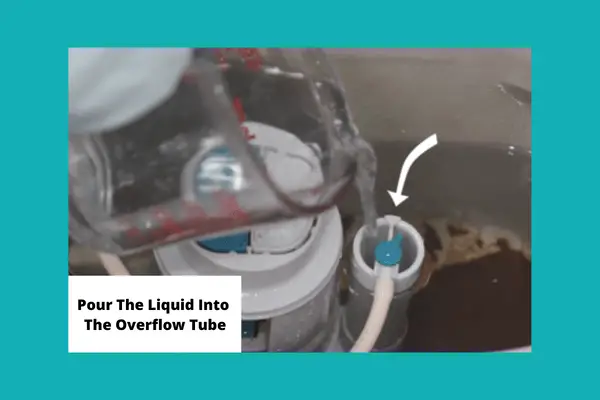
- Take 8 to 12 ounces of vinegar in a bowl and heat it.
- Then pour the liquid into the overflow tube of the toilet tank.
- Leave it for about 30 minutes.
- Turn the water supply valve back on and then flush the toilet.
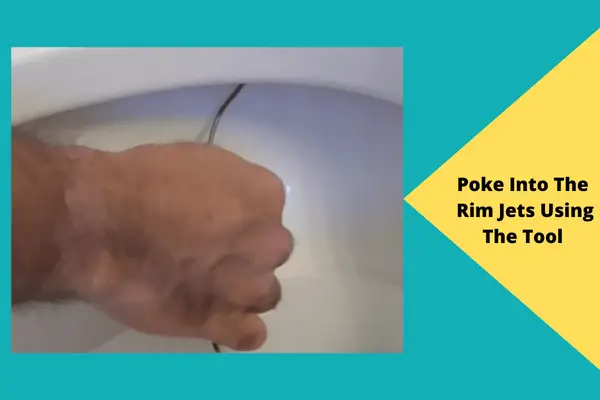
- Now, wear protective gloves and take a thin tool such as an Allen wrench or piece of wire.
- Now poke into the rim jets using the tool. Scrape out the blocked debris inside the holes.
- If needed, add more vinegar to the overflow tube to break down the mineral deposits. Also, it will kill the bacteria.
- After unclogging the jets, you should scrub the toilet bowl. Here you will need a toilet bowl cleaner and a toilet brush. Then scrub the toilet bowl.
- Once cleaning is done, reassemble the toilet, and the flush issue should be resolved.
2. Low Water Level In Toilet Tank
The amount of water in the toilet tank highly affects the flush system. If there is not enough water in the toilet tank and bowl, it will not put enough weight or pressure to completely empty the toilet bowl contents. In the tank, you will find a mark on the overflow tube, which tells how much water the tank is designed to receive. If the water level in the tank is not at the recommended level, you will encounter with weak flush without any doubt.
When the toilet does not get enough water on the first flush, the bowl will need a second flush to be completely emptied. So, in this troubleshooting stage, you will have to adjust the water level of the toilet tank.
How To Adjust Water Level In Toilet Tank
#Adjust Ball-And-Arm Float:
- First up, turn off the water supply to the toilet.
- Locate the external water valve and close it.
- Then flush the toilet to remove the remaining water in the toilet tank.
- Lift the toilet lid off and set it aside.
- Now you will see access to the flushing mechanisms inside the tank
- Check the water level in the tank. It should be 1–2 inches below the fill valve and overflow tube.
- If the water level is lower than the recommended level, you have o increase it. There is a plastic ball attached to a long arm at the top of the fill valve, which is referred to as a toilet float. It basically determines how much water remains in the tank after it refills.
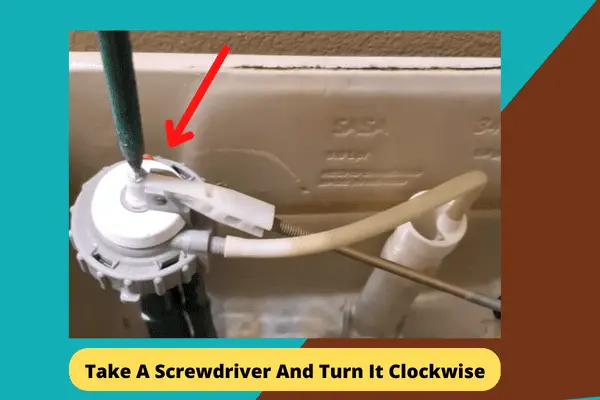
- So, now you have to adjust the float height. Locate a screw on top of the fill valve.
- Take a screwdriver and turn it clockwise to raise the water level.
- Finally, turn on the water shut-off valve and flush the toilet to verify the water level.
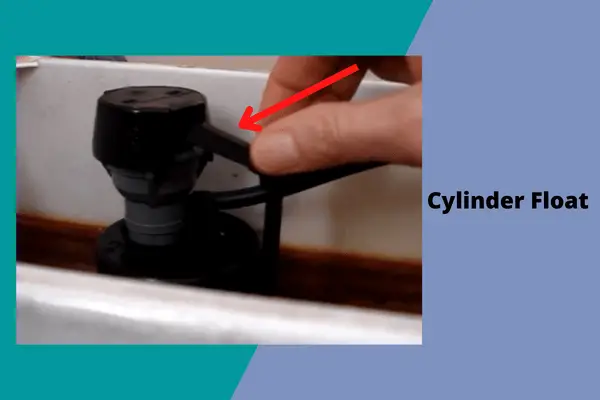
#Adjust A Cylinder Float:
If your toilet has a cylinder-type float, follow the below instruction to control the level of water of this toilet tank mechanism:
- Turn off the water supply and then flush the toilet to remove the water.
- Remove the tank lid and set it aside on a flat surface.
- Now locate an adjustment screw that is connected to the float and the fill valve.
- Turn the screw clockwise to higher the water level until it reaches 1–2 inches below the fill valve and overflow tube.
- After adjusting, turn on the water and fill the tank. Flush the toilet a couple of times to test the adjustment.
3. Worn-out Flapper
A worn-out flapper is another leading reason if your toilet only flushes every other time. The toilet flapper is an essential element of the toilet tank that prevents water from escaping the tank when you are not flushing.
But in the case of the malfunctioning of the flapper, the water will continually drain from the tank. For this, when you flush the toilet, there will not be enough pressure to empty the contents of your toilet bowl.
There is an adjustable chain attached to the flapper, which lifts up the flapper and allows all the water in the tank to pour into the toilet bowl when flushing.
But if the flapper is old or damaged, the chain will not lift up, and water will slowly leak out of the tank. This causes a slow flush for the first time and needs multiple flushes to empty the bowl content.
So, the only solution is to replace the old damaged flapper.
How To Replace The Flapper On A Toilet Tank
- Turn off the water supply to your toilet tank.
- Flush the toilet to drain the remaining water on the tank. Lift the tank lid.
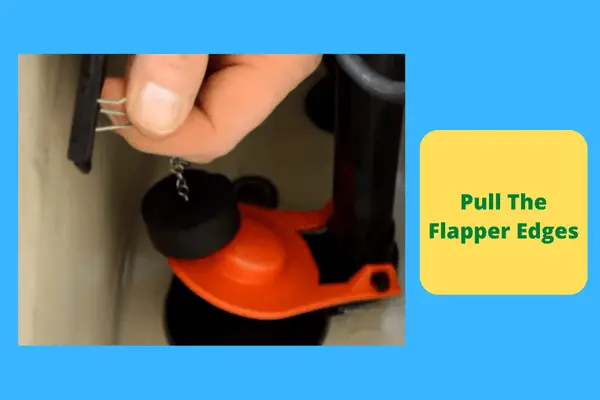
- Now, disconnect the bad flapper valve. First, unclip the chain and let the chain drop. Then pull the flapper edges free from the pegs.
- After that, take the new flapper, and it should be the right size to cover your toilet’s flush valve.
- Connect the flapper to the flush valve. First, clip the lift chain to the lower end of the toilet handle lever and let the flapper sit squarely over the flush valve by lowering it. If necessary, gently push down the flapper until it snaps into pace.
- Finally, ensure a proper adjustment of the chain to the toilet handle lever to open the valve easily when the toilet is flushed.
- Replace the toilet tank lid and turn on the water stuff-off valve.
4. The Flapper Closes Too Soon
After replacing the flapper and in case of toilet still takes several attempts to flush, be sure the flapper might be closing too soon. If the flapper closes too soon, it will not let enough water into the bowl, causing quite less power to push everything down the drain in one go.
So, now you need to do something that will keep the flapper up a few seconds longer to allow the right amount of water to get into the bowl. The only solution is shortening the flapper chain to fix toilet flushing multiple times.
How To Fix Toilet Flapper Closes Too Quickly
- Here, the slack of the flapper chain might be loosened between the trip lever, flush lever, or flushing handle and the flapper. Too little slack will keep the flapper open for too long.
- Now, unhook the chain from the handle. Then shorten it by a link or two.
- Reattach the chain back in place.
- You have to make sure that the chain has a quarter to half an inch of slack only.
- Test the adjustment by flushing the toilet. If the flapper rises to the vertical position and stays up, it assures that the repair is complete.
5. Partially Clogged Sewer Line
If your toilet requires multiple times to flush the content of the toilet bowl, your problem is most likely an issue with the main sewer line of your house, which is clogged.
A sewer line is a pipe that runs out the bathroom wall and goes up to the roof of your house. But this plumbing component might be blocked due to several reasons.
Blocked sewer lines or pipes will prevent water from fully flushing down the toilet. For this, the water will not flow fast enough to completely empty your toilet bowl.
So, after diagnosing the problem, perform a sewer line cleanout immediately. By doing this, you can ensure a grime-free drainage system for the toilet.
How To Clean Out Clogged Sewer Line
Method#1: Use Hot Water
You can use hot water to unclog your main sewer line. Just run through the hot water plumbing system for about 5 to 10 minutes. It will help to loosen debris effectively. Doing this several times might be best to unclog that main sewer line.
Method#2: Use A Plunger
The plunger is one of the effective ways to unblock the main sewer line. It will create an airtight seal with the drain. And put enough pressure into the plunger to clear the clog available.
Take a plunger and start pushing the plunger up and down to loosen the stuck debris. You have to repeat the entire process to ensure the clog is cleared away.
Method#3: Use Plumbing Snake
You can use a plumbing snake to dislodge the stuck debris from the sewer line. Take a plumbing snake and position it as close as possible to blockage.
Now twist the tool and push it back and forth to break up the clog. Attempting this method multiple times will remove the debris enough to remedy the problem.
Method#4: Using A Power Washer
It is one of the most effective methods to unclog the main sewer line. But it is highly recommended to put on protective glasses and rubber gloves before attempting this method.
- First, attach the sewer jetter to the power washer trigger gun.
- Then, thread the sewer jetter into the sewer line opening far enough and insert the nozzle down to the drain.
- Now, turn on the power washer and start spraying the water into the drain.
- Increase the water pressure gradually and move the jetter back and forth.
- Continuously spray the water until you’ve successfully unclogged the line.
- After cleaning, turn off the power washer and pull the jetter out of the pipe.
FAQs:
How To Increase Toilet Flush Pressure?
In order to increase the toilet flush pressure, you have to concentrate on the water level in the tank first. Clean the toilet rim jets and sewer lines if they are clogged. Check and replace the bad flapper and ensure a proper adjustment of the flapper chain in the tank.
How long should the toilet flapper stay open?
The toilet flapper should stay open as long as the content of the toilet bowl will flush completely. After pressing the flush button, the flapper opens a vertical position, stays open long enough, and allows water in the tank to flow to the rim jets.
Wrapping Thoughts:
Well!! Throughout the above guide, we have clearly discussed how do you fix a toilet that needs to be flushed twice. Hopefully, now, you will effectively fix your toilet issue by following the above-assembled solution procedures.
Let us know if you face any troubles while fixing the issue. We will give our level best to help you out.