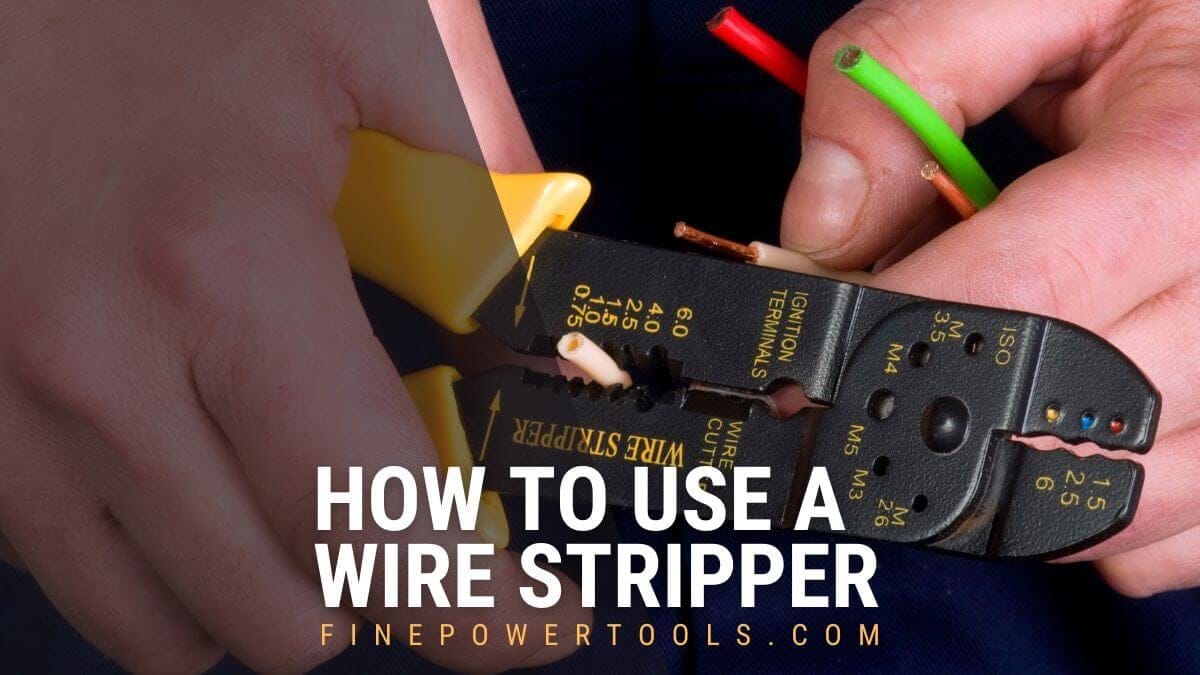
A wire stripper is a tool specifically designed for removing insulation from wires accurately, unlike clippers and others. When properly used, they allow you to strip wires without damaging their conductive strands, which could affect the wires’ conductivity.
In this article, you will find an insight into wire strippers and all you need to know to use them properly.
What is a Wire Stripper?
A wire stripper is a hand tool designed to accurately remove a small portion of the insulating layer from electrical wires in preparation for soldering, connecting, and repairing. The tool has a series of notches or blades to accommodate wires of different gauges to ensure that the wire strands inside remain undamaged during stripping.
Wire strippers are vital for electrical and electronic jobs requiring precise wire stripping. Using the right tool for the job helps work faster and more accurately.
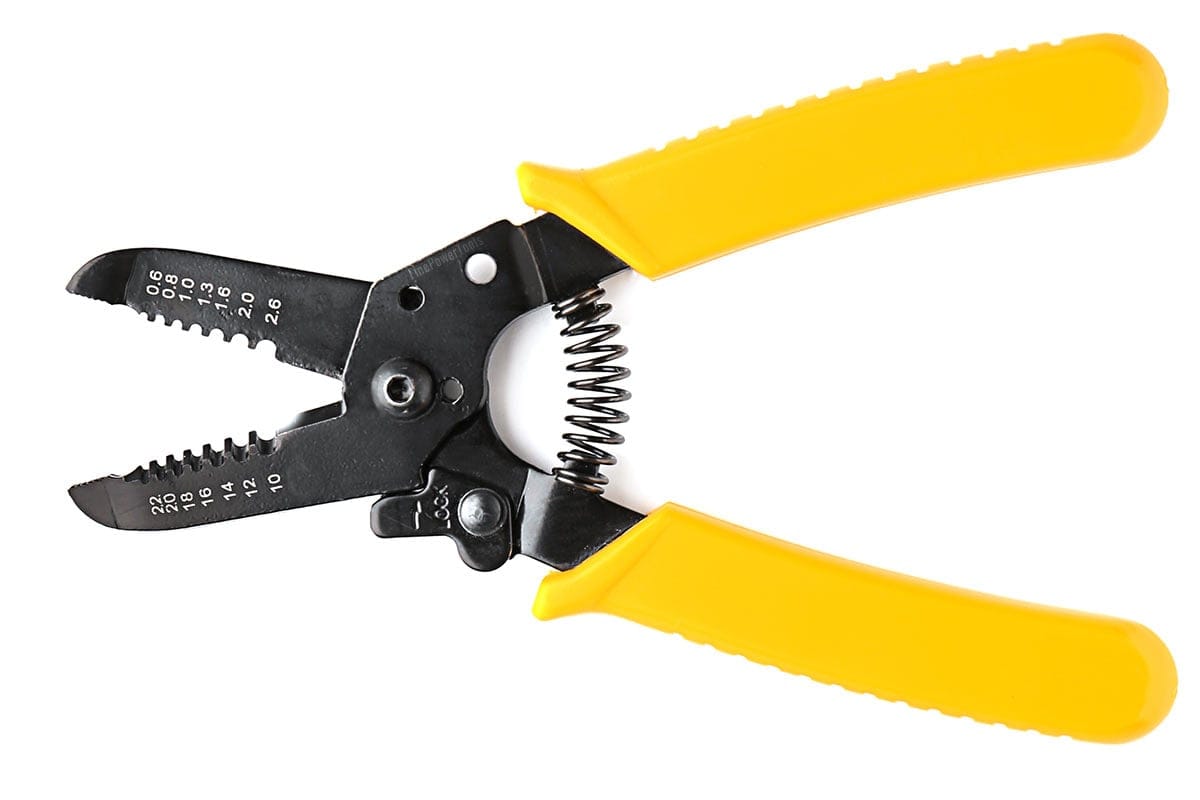
The most commonly used wire strippers are usually called “manual wire strippers.”
While many manual wire strippers resemble scissors, there are significant differences in their design and functionality.
When you look at a manual wire stripper from the front, you will usually see some sections with holes and rounded slots toward the handle. The holes and the slots have different diameters for working with wires of different thicknesses.
One of the sides is called the “jaw” or “jaw area” and holds the wire in place. The other side features a blade that, when closed, cuts the wire’s insulation. Both sides often feature blades to cut wires downwards, near the tool’s grip.
Applications of Wire Strippers
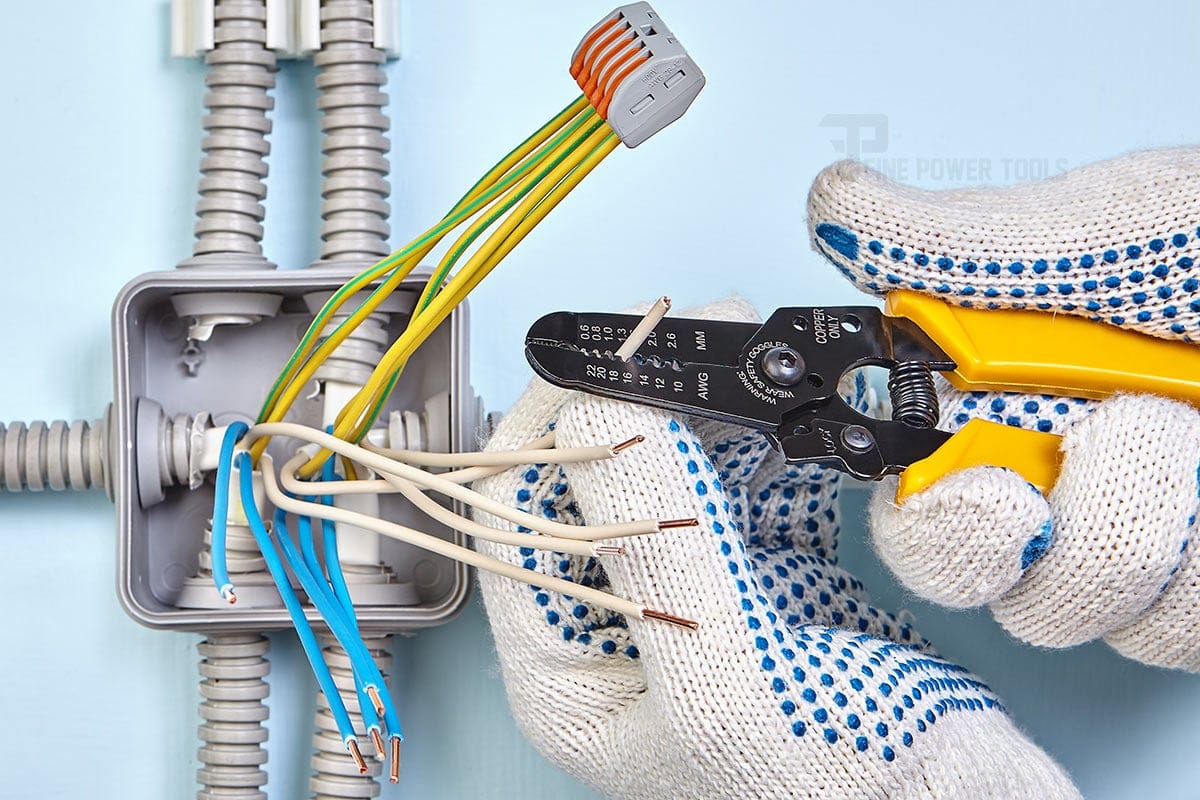
Wire strippers are primarily used by electricians to safely and efficiently remove the insulation from electrical wires, preparing them for tasks such as soldering, electrical repairs, and creating secure connections.
Proper wire stripping is crucial for successful soldering. Cleanly stripped wires ensure a strong and reliable soldered connection, free from contaminants and potential defects.
A stripped wire provides a clean surface, allowing solder to bond more efficiently, which is essential for both electrical conductivity and mechanical strength.
Advantages of Wire Strippers
You could use pliers or other non-specific tools to stripe wires, but using wire strippers comes with these advantages:
- Precision and Control: With practice and some training, wire strippers help you strip wires without damaging their core or nearby wires in multi-wire cables.
- Efficiency: Wire strippers allow you to strip wires faster and in a more straightforward way than other tools like scissors, clippers, or others. Besides, they are great for jobs where you need to strip multiple wires, making repetitive jobs simpler and less tedious.
- Safety Operation: Wire strippers are safe to operate for the operator and safe for the wires, minimizing the risks of damaging the wire’s core.
- Consistency: These tools help you to achieve consistent results, which is crucial for achieving reliable and neat connections.
Key Factors Before Stripping
Before stripping a wire, it’s essential to know its characteristics to avoid damaging the core or rendering it unusable. Below, you will find information about different wire and insulation types that will be helpful when using any type of wire stripper.
Identifying Different Wire Types
Wires come in multiple ways and formats; knowing how to identify them is key for properly stripping them.
- Single Wire vs. Multi-Conductor Cables: First, you want to check if you will be stripping a single wire or multi-conductor cable. Multi-conductor cables can be tricky because the jacket or external insulation can be harder than the one found in single wires.
When stripping a multi-conductor wire, you must start stripping the outer layer and then strip each cable in the package. When stripping the jacket, you must be careful not to cut, damage, or mark any individual wires inside. - Wire Composition: The conductor or core of a wire is usually made of copper or aluminum. Copper wires tend to be stronger than their aluminum counterparts. That’s why you must take extra caution when stripping aluminum wires.
- Solid vs. Stranded Wires: Solid wires are easier to work with because there is no risk of cutting or ripping some strains off while stripping them. Besides, when stripping a solid wire, it’s easier to identify when you have cut the insulation and reached the core, allowing you to stop applying pressure before doing any harm.
However, it’s worth noting that while solid wires are generally easier to strip, they can break more easily if bent repeatedly.
Understanding Wire Gauges
Wire gauge is a standardized system specifying the diameter or thickness of electrical and electronic wires’ conductors (the metal wire inside). Knowing this rating is essential to ensure a positive result and prevent damage when stripping wires.
Wire gauges can be expressed in millimeters or inches. AWG (American Wire Gauge) is the standard gauge system for the United States and Canada, among others, and is measured in inches. In Europe and many other countries using the metric system, gauges are usually expressed in square millimeters (mm²).
In the UK and a few other regions, you can also find the SWG (Standard Wire Gauge) standard, which is based on the older British system.
How to Read Wire Gauges?
Let’s see how to read wire gauges, depending on the marking standards used by the manufacturer:
- AWG (American Wire Gauge): In the AWG system, a lower number indicates a thicker wire. For example, a 10 AWG wire is thicker than a 20 AWG wire. The larger the AWG number, the thinner the wire.
- Metric (mm²): Gauges in the metric system express the wire’s cross-sectional area in square millimeters (mm²). In this case, a larger number represents a thicker wire. For example, a 5mm² wire is thicker than a 2mm² one.
- SWG (Standard Wire Gauge): SWG gauges are read as the AWG. The larger the SWG number, the thinner the wire.
Manual vs Automatic
Besides manual wire strippers, there are also adjustable and automatic strippers that self-adjust to wire sizes, optimizing efficiency. It’s essential to choose the right stripper for the task; for instance, a tool designed for thick household wires isn’t ideal for delicate electronics work.
Since you are most likely to have a manual wire stripper, I will explain the right way to use a manual version.

How to Use a Wire Stripper Properly?
This step-by-step guide explains how to use a manual wire stripper safely and effectively.
1. Safety First
- Power Off: If you will be working with household, industrial, or other wires connected to the power grid, switch off the power to the circuit. Avoid attempting live wire stripping unless you are a trained professional.
- Electronic Circuit Precautions: When working with electronic devices, unplug them from the power source. If dealing with battery-powered circuits, remove or deactivate the batteries to prevent electrical shocks or sparks during wire stripping.
2. Determine the Wire Type
Identify the wire type you will be working with:
- Is it a jacketed or multi-conductor cable or a single wire?
- Is it single or stranded?
- Check the insulation hardness and other relevant characteristics to choose the correct hole or slit on your wire stripper.
3. Prepare the Wire
Cut the wire to the desired length using a pair of pliers or the wire stripper’s wire cutter, if included. If you have a wire section, cut the tip to ensure the end is even.
4. Get Ready for Stripping the Wire
Depending on your wire stripper, you will have holes with inscriptions displaying the gauge number and/or the conductor’s diameter expressed in AWG and mm. In that case, find the size that adjusts best to the wire you want to strip.
Old or simpler wire strippers only have several slits in different sizes, usually with no markings. In that case, choosing the right opening is more tricky; you will have to use your intuition and eventually practice to determine which slit you should use.
* If you are not sure about the wire’s gauge, it’s safer to start with a larger hole/slit to avoid accidentally cutting the wire strands.
5. Cut the Wire’s Insulation
Insert the insulated wire in the selected stripping notch and press firmly both handles to close both jaws onto the wire and make an incision in the wire’s insulation.
Open the wire stripper slightly, give the wire a slight twist to ensure the insulation is fully cut around its circumference, and then proceed to the next step.
Don’t open the tool yet.
6. Remove the Trimmed Insulation:
- Thin and Delicate Wires: Open the wire stripper, remove the wire, and gently remove the trimmed insulation from the tip using your fingers. This will ensure that you don’t harm the core during the process. If you find any uncut parts of the insulation, repeat step 5.
- Thick and Strong Wires: Press the wire stripper hard on the wire and use your free hand to pull in the opposite direction to remove the insulation.
7. Damage Inspection
Inspect the stripped wire for nicks and damage. If you notice any damage, cut the wire and repeat the process. Even minor nicks or cuts on a wire can notably reduce its current-carrying capacity, posing a potential failure risk.
When using a manual wire stripper, choosing a stripping hole or slot that matches the wire’s gauge perfectly is essential. Selecting a wire slot or hole too small will damage the wire and the internal wires in the case of multi-conductor cables.Choosing a larger hole or slot may not touch the insulation or fail to remove it effectively. If you are unsure about the wire size, start with a larger notch and move on to smaller ones until you find the right one.
Final Words
Wire strippers are small, affordable tools that can help you save time and enhance the quality of your electrical and electronic projects. To ensure the longevity and safety of your wire stripper, regularly clean it, maintain sharp blades, and store it in a dry location to prevent rust and deterioration.
Remember to disconnect power sources when working with live circuits and take all the necessary precautions to prevent accidents.
With some practice, you will master the art of stripping wires with precision in no time!